Minimum Requirements:
- OS: Windows 10 x64 / Windows Server 2016 x64 or later
- SQL: MySQL 5.6 or later
Contents
- Installing MySQL
- Installing Glovizor
- Configuring the MySQL Connection
- Configuring the Web Server and Glovizor Services
- Checking the Web Interface
- First Login
- Configuring Windows Firewall
- Checking Internet Access
- Checking Automatic Startup
Installing MySQL
Install MySQL Server and make sure the MySQL service is running. To configure Glovizor, you will need the username and password of a MySQL account with permission to create databases.
Detailed MySQL installation and configuration are not covered in this guide.
Installing Glovizor
Download the Glovizor archive for Windows and extract it to a permanent directory, for example:
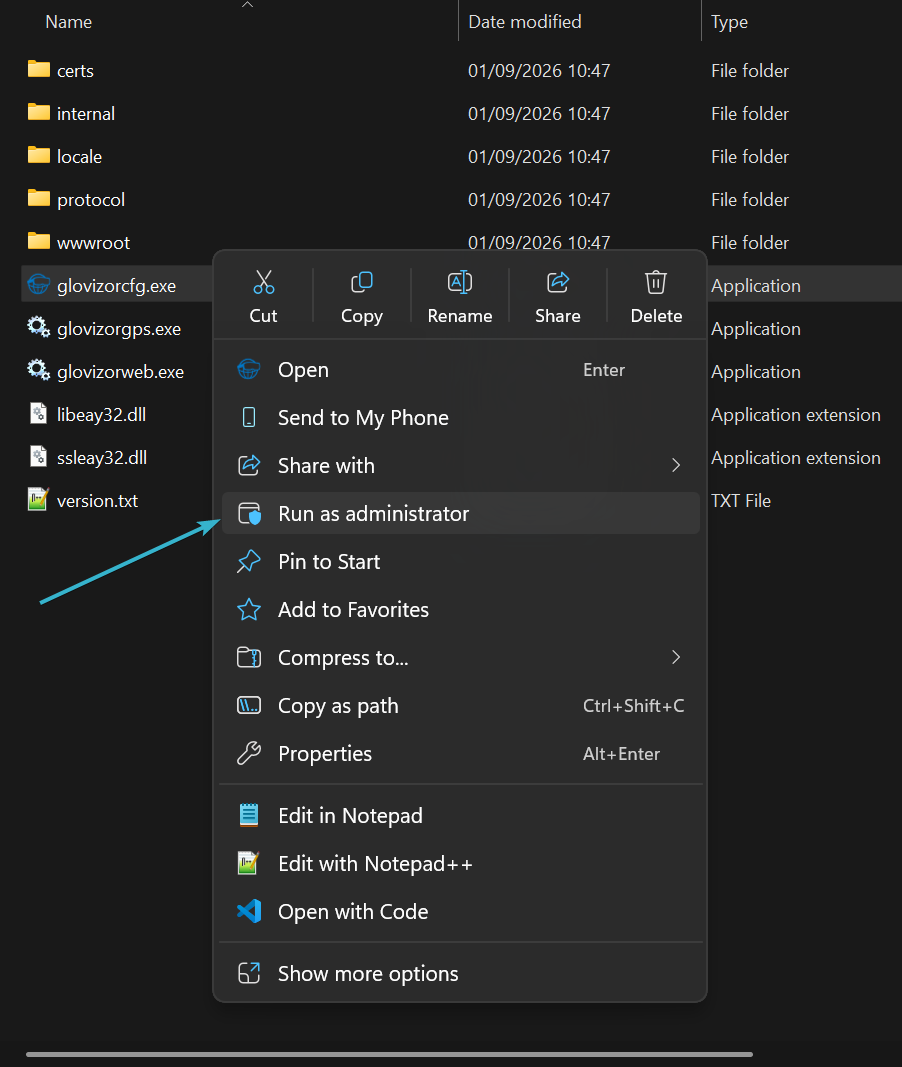
C:\glovizorFor the initial setup, run glovizorcfg.exe as administrator.
Configuring the MySQL Connection
After starting glovizorcfg.exe, open the Sql server tab.
The Connection to MySQL server section contains four fields:
- Server — MySQL server address. If MySQL is installed on the same computer, enter
localhost. - Database — Glovizor database name. Enter
glovizor. - User — MySQL username.
- Password — MySQL user password.
Below the fields are the Test and Create buttons.

First, click Test. If the connection to MySQL works but the Glovizor database has not yet been created, the following error will be displayed:
Error: #42000 Unknown database 'glovizor'This is expected: the MySQL server is accessible, but the glovizor database does not exist yet.
Close the message and click Create. After the database is created successfully, the message Done! will appear.
Click Test again and make sure the database connection is established without errors.
Click Save to save the settings.
Configuring the Web Server and Glovizor Services
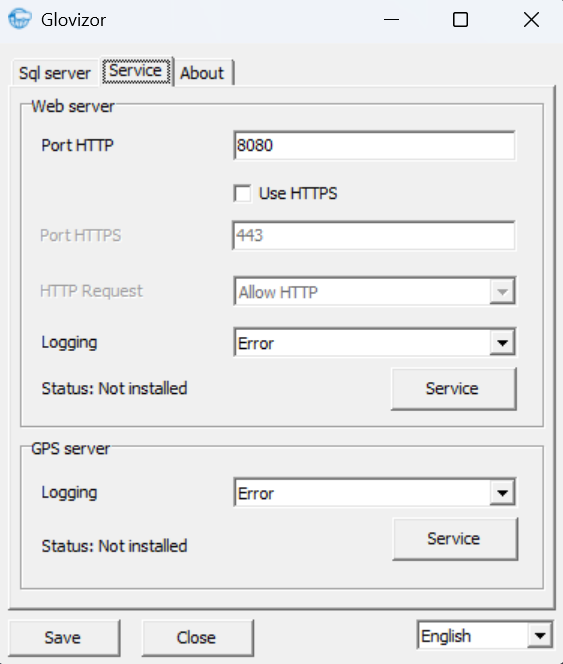
Open the Service tab.
Web server
At the top of the tab is the Web server section. For a standard installation, use the following settings:
- Port HTTP —
8080 - Use HTTPS — on
- Port HTTPS —
443 - HTTP Request — Allow HTTP
- Logging — Error
After changing the settings, click Save.
On the right side of the Web server section is the Service button. Click it and select Install service.
After the service is installed successfully, click Service again and select Start service.
The Status field should change to Running.
GPS server
Below is the GPS server section.
Click Service and select Install service. After installation, open the Service menu again and select Start service.
The Status field for the GPS server should also show Running.
After that, you can close glovizorcfg.exe. The Web and GPS components will continue running as Windows services.
Checking the Web Interface
On the server itself, open the following in a browser:
http://localhost:8080The Glovizor login page should open.
Then open:
https://localhostGlovizor includes a self-signed TLS certificate, so the browser will warn that the certificate is not trusted. Open the advanced options in the warning and allow access to the site.
First Login
After installation, use the built-in account:
Login: admin
Password: leave the field blank
Select the interface language and log in to Glovizor.
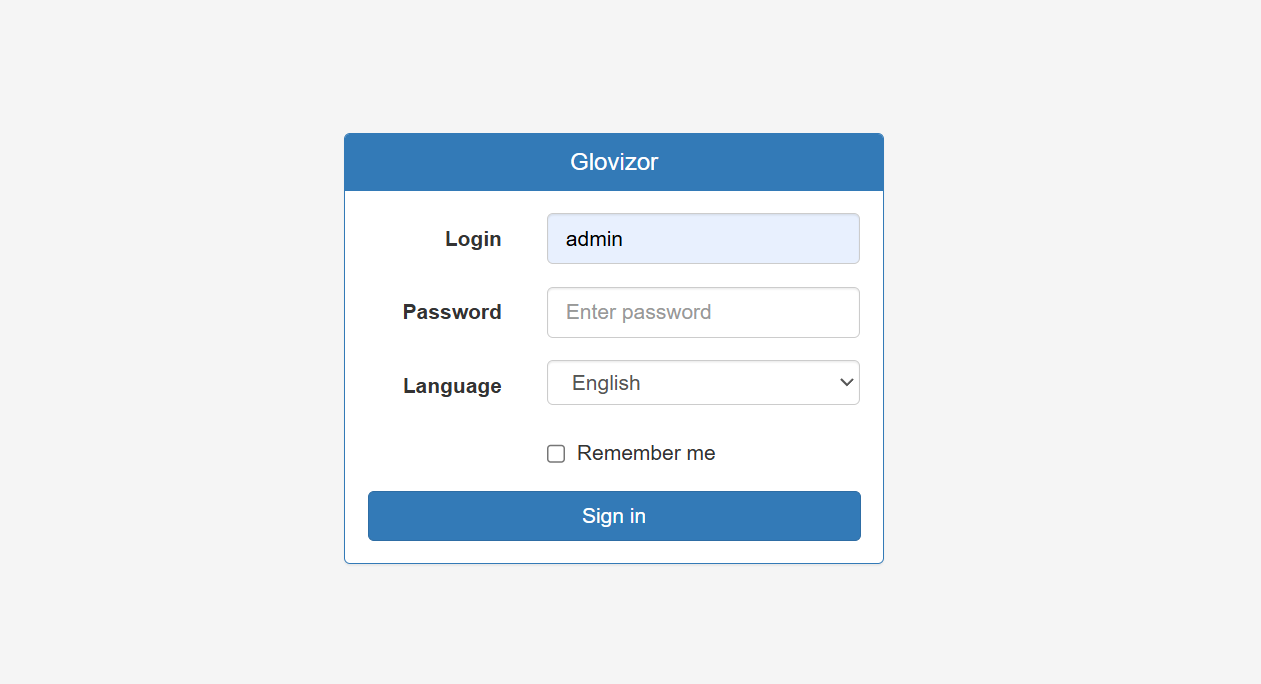
After the first login, set a password for the admin user. To do this, click the admin name in the upper-right corner. In the user window that opens, enter the new password in the Password and Repeat password fields, then click OK.
Configuring Windows Firewall
Open Windows Defender Firewall with Advanced Security. To do this, press Win + R and enter:
wf.mscOn the left side of the window, select Inbound Rules, then click New Rule on the right.
- On the Rule Type step, select Port.
- On the Protocol and Ports step, select TCP.
- Select Specific local ports and enter:
443,8080,5001-5021 - Click Next.
- On the Action step, select Allow the connection.
- On the Profile step, leave the required network profiles selected.
- On the Name step, enter, for example,
Glovizorand click Finish.
Ports 443 and 8080 are used by the Web server. The standard set of 21 GPS protocols uses TCP ports 5001-5021. If the port for a specific protocol has been changed in Glovizor, allow the TCP port actually assigned to it in Windows Firewall.
Checking Internet Access
From another computer, open:
https://SERVER_IPTo test HTTP:
http://SERVER_IP:8080When opening HTTPS for the first time, the browser will display a warning about the self-signed certificate. Allow access and make sure the Glovizor login page opens.
Checking Automatic Startup
Restart Windows.
After the server starts, open Glovizor in a browser and make sure the Web interface is available without manually starting any programs.
For an additional check, press Win + R, run services.msc, and find the Glovizor Web and Glovizor GPS services. Both services should have the Running status.